
You throw a load of towels into the dryer, set it for forty-five minutes, and walk away to handle other chores. When the buzzer finally sounds, you reach in only to find the fabric still damp and steaming. Frustrated, you restart the cycle for another hour. This common household annoyance isn’t just a waste of your afternoon; it’s a glaring signal that your home is burning through unnecessary cash and facing a significant safety hazard. According to data from the National Fire Protection Association, nearly 16,000 home fires involve clothes dryers every year—with the leading cause being a simple failure to clean out the lint and dust. Beyond the danger, a clogged vent forces your machine to work twice as hard, spiking your monthly electric or gas bill and shaving years off the appliance’s lifespan.
Most homeowners assume that cleaning the lint trap after every load is enough. While that habit is essential, it only catches about 70 percent of the debris. The remaining 30 percent bypasses the filter and settles in the internal ductwork. Over months and years, this accumulation restricts airflow, traps heat, and creates a highly flammable “wick” inside your walls. Taking thirty minutes to perform a dryer vent cleaning diy project doesn’t just provide peace of mind; it’s one of the highest-return maintenance tasks you can perform for your home’s efficiency.
The Financial Impact of a Clogged Dryer Vent
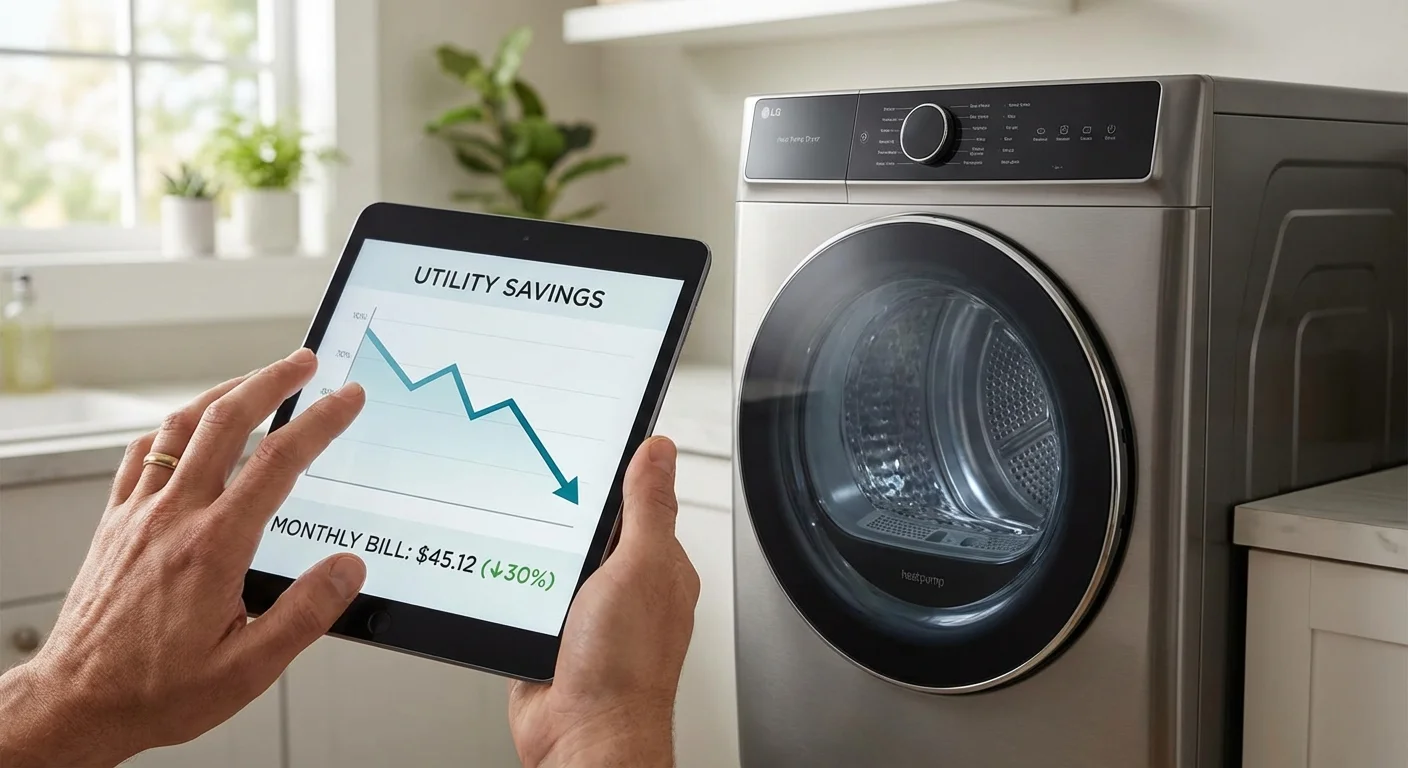
When you ignore the buildup in your dryer vent, you are essentially paying a “clog tax” every month. Clothes dryers are among the most energy-intensive appliances in the typical American household. A standard electric dryer uses between 2,000 and 6,000 watts of electricity—roughly equivalent to running 50 to 150 large LED light bulbs at once. When airflow is restricted, the dryer cannot effectively vent the moist air out of the drum. This means the heating element stays on for much longer than necessary to achieve total dryness.
Consider the math of a typical household running five loads of laundry per week. If a clogged vent forces you to run each load for an extra thirty minutes, you are adding ten hours of high-wattage operation to your monthly utility bill. At average U.S. electricity rates, this can easily add $15 to $25 per month to your expenses. Over the course of a year, that’s $300 literally disappearing into thin air. Furthermore, the excess heat generated by a blocked vent causes the thermal fuse and the motor to overheat, which leads to premature appliance failure. Replacing a modern dryer can cost anywhere from $600 to $1,400; a thirty-minute cleaning session effectively protects that investment.
“Beware of little expenses; a small leak will sink a great ship.” — Benjamin Franklin
Telltale Signs Your Vent Needs Immediate Attention
You don’t need to wait for a fire or a total breakdown to know it’s time to clean your ducts. Your dryer provides several clear warning signs that it is struggling to breathe. If you notice any of the following, move vent cleaning to the top of your weekend to-do list:
- Extended Drying Times: If a standard load takes more than one cycle (usually 45–60 minutes) to dry completely, your airflow is likely restricted.
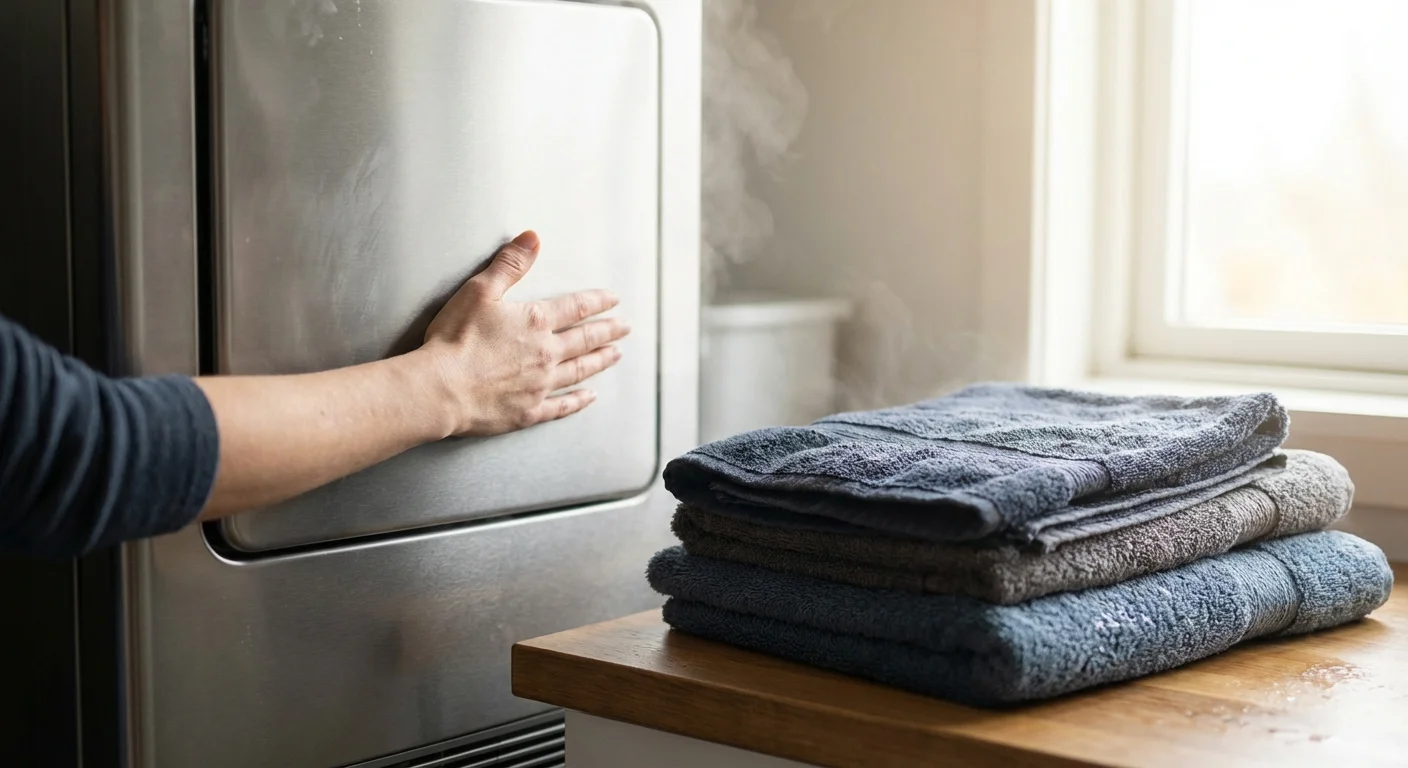
- Extreme Heat: If the top of the dryer is hot to the touch or if your clothes feel unusually scorching when you pull them out, the heat is being trapped inside the machine rather than venting out.
- Musty Odors: Damp lint trapped in the vent can grow mold or mildew, creating a stale scent that transfers to your “clean” clothes.
- The Outside Flap Stays Shut: Go outside while the dryer is running. If the vent flap on the side of your house isn’t opening, or if you don’t feel a strong gust of warm air, you have a major blockage.
- Excess Lint Around the Machine: Finding lint on the floor behind the dryer or on the wall near the vent connection suggests the air is backing up and leaking out of the seals.
Your DIY Toolkit: Everything You Need to Start
You don’t need expensive professional equipment to clear most household dryer vents. Most hardware stores sell dryer vent cleaning diy kits for $20 to $40. These kits usually include several flexible rods that screw together and a synthetic bristle brush. You can find more information on home maintenance standards at Energy.gov to ensure you’re using the right materials.
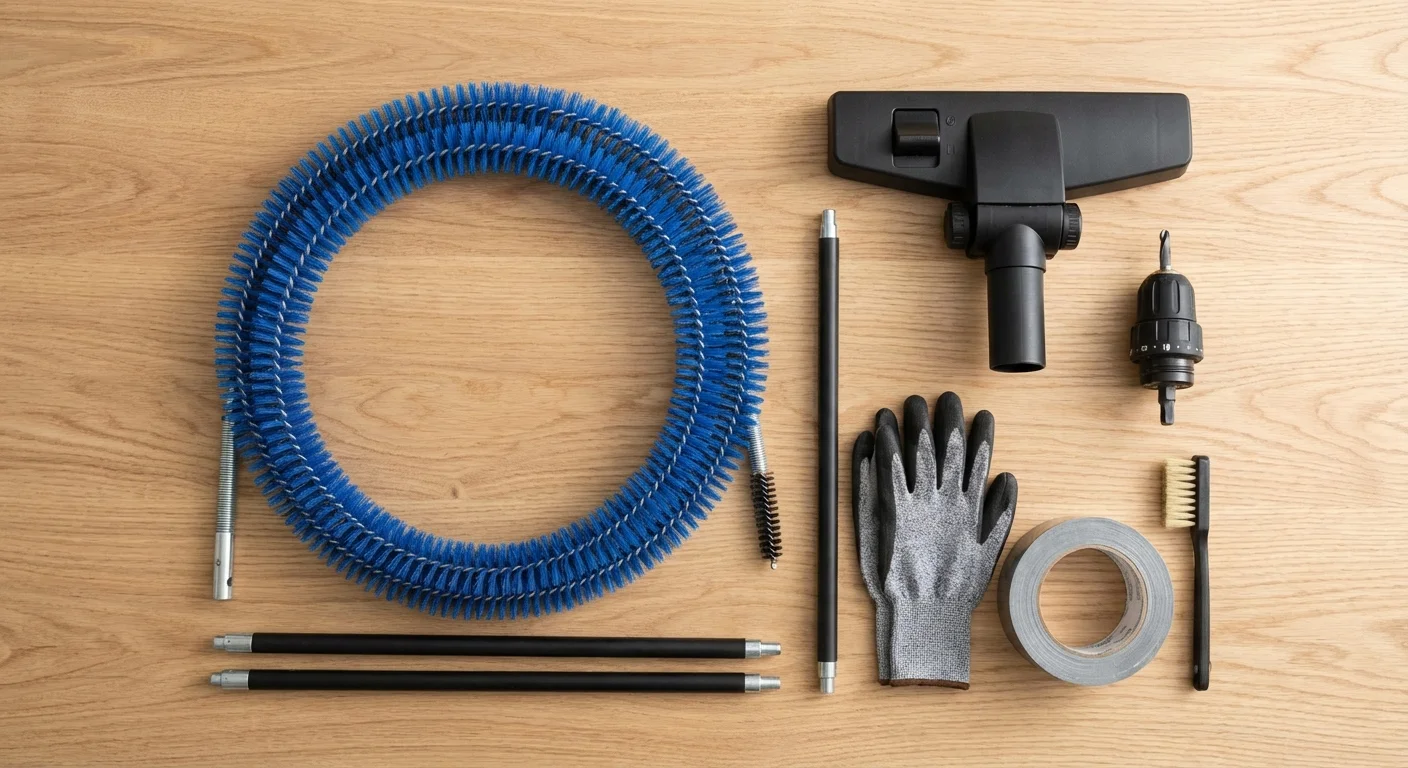
Before you begin, gather these items:
- A Vent Cleaning Kit: Look for a kit with at least 12–20 feet of extension rods.
- A Vacuum with a Hose Attachment: A shop-vac is ideal, but a standard household vacuum works if it has a long reach.
- Power Drill: Most cleaning brushes attach to a standard cordless drill to spin the bristles and break up stubborn clogs.
- Screwdriver or Nut Driver: You’ll need this to loosen the clamps holding the vent hose to the back of the dryer.
- UL-Listed Metal Foil Tape: Avoid “duct tape” (ironically); it dries out and peels off over time. Metal foil tape is heat-resistant and provides a permanent seal.
The Step-by-Step Guide to Cleaning Your Dryer Vent
Follow these steps to ensure a thorough cleaning that restores airflow and maximizes home safety maintenance.
Step 1: Disconnect the Power and Gas
Safety is the priority. For an electric dryer, simply unplug the power cord from the wall. If you have a gas dryer, turn the supply valve to the “off” position before moving the unit. You don’t want to accidentally strain or kink a gas line while you’re working behind the machine.
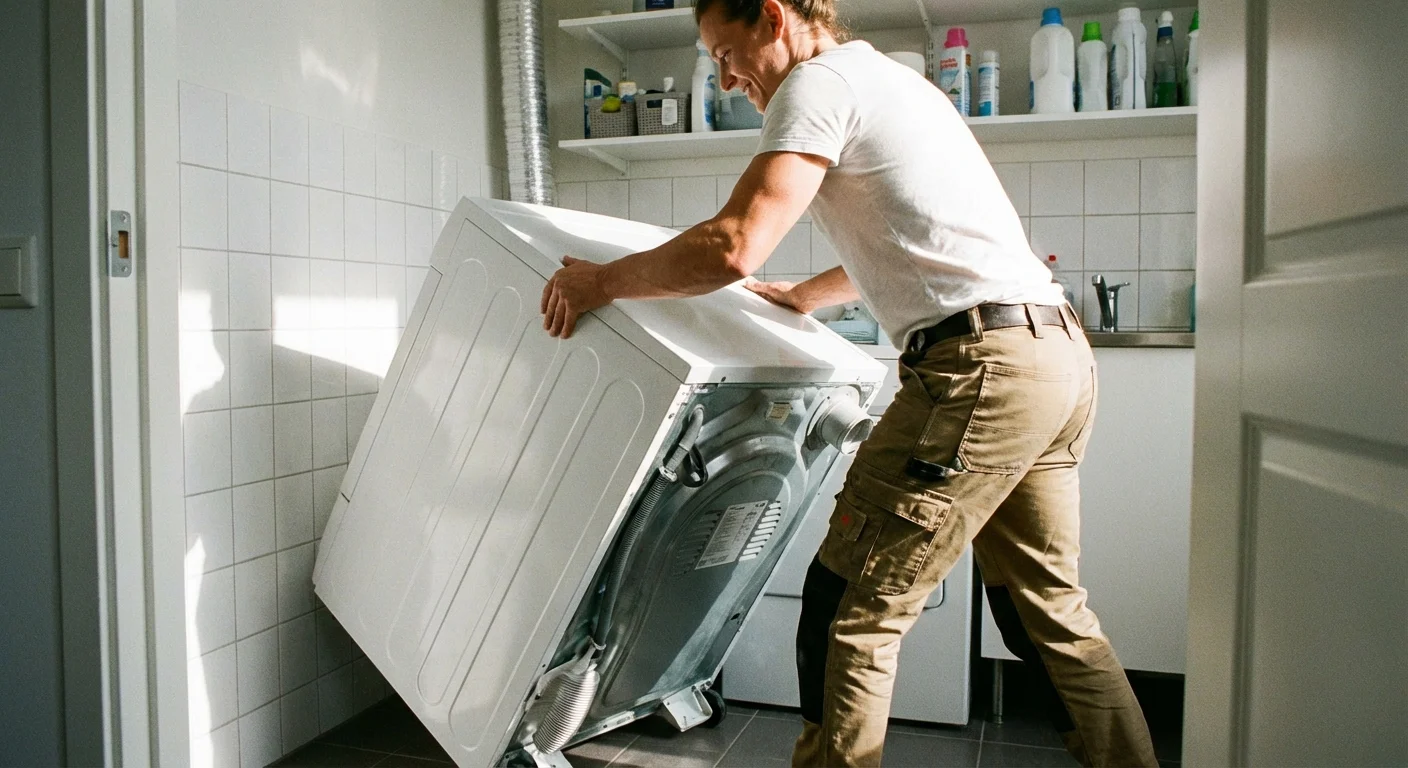
Step 2: Pull the Dryer Out
Gently slide the dryer away from the wall to give yourself enough workspace. Be careful not to tug on the vent hose or wires until you can see behind the unit. Once you have a few feet of space, use your screwdriver to loosen the clamps on the flexible vent hose and pull it away from both the dryer and the wall port.
Step 3: Vacuum the Internal Areas
Start by vacuuming the lint trap housing. Remove the lint screen and use a narrow vacuum attachment to reach deep into the slot. Next, vacuum the exhaust hole on the back of the dryer itself. You’ll be surprised how much lint accumulates just inside the machine’s exit port.
Step 4: Brushing the Wall Duct
This is where the magic happens. Assemble your cleaning rods and attach the brush. Insert the brush into the hole in the wall. If you are using a drill, keep it spinning at a medium speed in a clockwise direction—this prevents the rods from unscrewing while they are inside the wall. Push the brush forward about a foot, then pull it back to clear the debris. Continue adding rods until you reach the exterior of your home.
Step 5: Clean the Exterior Vent
Go outside and locate your dryer’s exit vent. Use your hands or a small brush to clear away any lint trapped in the louvers or the bird guard. If your kit reached all the way through, you should see a pile of lint on the ground. Reach into the duct from the outside as far as you can to ensure no large clumps are blocking the exit flap.
Step 6: Reconnect and Test
Vacuum up the mess you’ve made behind the dryer. Inspect your flexible transition duct; if it’s made of thin plastic or foil “slinky” material, replace it with a semi-rigid metal duct. These are much safer and more efficient. Reattach the ducting using your clamps and a bit of metal foil tape for a semi-permanent seal. Plug the unit back in, turn on the gas, and run the dryer on a “fluff” or “air dry” setting for 10 minutes to blow out any remaining loose dust.
Costly Mistakes to Avoid
While this is a straightforward task, certain errors can actually make your dryer less efficient or even more dangerous. Avoid these common pitfalls to ensure your lower dryer energy use goals are met.
| Mistake | Why It’s Costly | The Better Way |
|---|---|---|
| Using Plastic Flex Ducts | Plastic is highly flammable and the ridges trap lint quickly. | Use UL-listed rigid or semi-rigid metal ductwork. |
| Over-tightening Clamps | Can crush the duct, restricting airflow from day one. | Tighten until snug; use foil tape to ensure an airtight seal. |
| Spinning the Drill Counter-Clockwise | The cleaning rods can unscrew and get stuck deep inside your walls. | Always spin the drill clockwise to keep connections tight. |
| Ignoring the Outside Flap | A stuck flap can lead to moisture buildup and mold in your walls. | Inspect the exterior vent monthly to ensure it moves freely. |

Skip DIY When…
While most homeowners can handle a standard vent, there are specific scenarios where you should call a professional service. Specialized technicians have high-powered compressed air tools and industrial vacuums that can handle situations a $30 kit cannot.
- The Vent Path is Extremely Long: If your dryer is in the middle of the house and vents out through the roof or a path longer than 25 feet, DIY rods may not be long enough or flexible enough to navigate multiple turns.
- You Suspect a Pest Infestation: If you find nesting materials (straw, twigs) or see droppings, a bird or rodent may have moved into your vent. Removing wildlife requires specialized care to ensure the vent is sanitized and properly screened.
- The Vent is Crushed Inside the Wall: If you cannot pass the brush through the duct, the metal piping inside your wall may have collapsed or disconnected. This requires a professional to locate the break and repair the internal structure.
- You Have a Roof Vent: Unless you are comfortable climbing a ladder and working on a pitched roof, leave roof-vent cleaning to a pro. Falling off a roof is significantly more expensive than a $150 cleaning fee.

How Often Should You Clean Your Vent?
For a standard household of four, an annual cleaning is usually sufficient. However, if you have pets that shed significantly or if you run more than one load of laundry per day, you should check the vent every six months. A quick way to test your efficiency is to time a load of towels. If a full load of heavy cotton towels takes more than 50 minutes to dry on high heat, your vent is likely starting to clog.
You can also check the Consumer Reports guide for specific appliance maintenance schedules that might apply to your specific dryer model. Keeping a simple log of your maintenance on a sticker near the dryer helps you stay on track and ensures you don’t forget this critical task.

The Long-Term Rewards of Proactive Maintenance
Beyond the immediate drop in your utility bill, cleaning your dryer vent offers long-term financial benefits that are easy to overlook. Modern appliances are filled with sensitive sensors and electronics. When a dryer runs at extreme temperatures due to a clog, these electronics degrade faster. By maintaining proper airflow, you extend the life of your dryer by an average of three to five years.
Furthermore, consider the “time is money” principle. If you save thirty minutes per load and do five loads a week, you’ve regained 130 hours of your life over a year. That is more than five full days previously spent waiting for laundry to finish. Being intentional with your home maintenance allows you to stop being a slave to your chores and start enjoying a home that runs smoothly and safely.
“It’s not your salary that makes you rich, it’s your spending habits.” — Charles A. Jaffe
Frequently Asked Questions
Can I use a leaf blower to clean my dryer vent?
While some people use leaf blowers to push out loose lint, it is not a complete solution. A leaf blower lacks the mechanical scrubbing action of a brush, meaning it won’t remove the “caked-on” lint that sticks to the walls of the duct when it gets damp. It can also create enough pressure to disconnect duct joints that aren’t properly secured inside your walls.
Does a “lint alarm” actually work?
There are aftermarket sensors you can install that monitor backpressure in the vent and sound an alarm when airflow drops below a safe level. These are excellent tools for homeowners who want an early warning system, but they don’t replace the need for physical cleaning.
Is it okay to have a dryer vent that goes into the attic or crawlspace?
Absolutely not. According to international building codes, dryer vents must exhaust directly to the outdoors. Venting into an attic or crawlspace pumps gallons of moisture into your home’s structure, leading to wood rot, massive mold growth, and a severe fire hazard. If your dryer currently vents into an enclosed space, you must reroute it immediately.
What is the best material for a dryer vent?
Rigid metal piping (usually aluminum or galvanized steel) is the gold standard. It has a smooth interior that minimizes lint buildup and provides the best airflow. If you must use a flexible connector between the dryer and the wall, choose a semi-rigid metal version rather than foil or plastic.
Taking Action for a Safer, Cheaper Home
Dryer vent cleaning is the ultimate “low-effort, high-reward” home maintenance task. For the price of a single pizza delivery and thirty minutes of your time, you can slash your energy bills, prevent a catastrophic house fire, and make your appliances last years longer. Don’t wait for the burning smell or the double-drying cycles to take action.
This weekend, pull your dryer away from the wall and take a look inside. If you see a wall of grey fuzz, you’re looking at a hidden expense you can easily eliminate. Grab a cleaning kit, clear the path, and enjoy the satisfaction of a home that works for you—not against your wallet.
This article provides general money-saving guidance. Individual results vary based on location, household size, and spending patterns. Verify current prices before making purchasing decisions.
Last updated: February 2026. Prices change frequently—verify current costs before purchasing.


Leave a Reply